By Nancy Morgan, RN, BSN, MBA, WOC, WCC, DWC, OMS
Each issue, Apple Bites brings you a tool you can apply in your daily practice.
Measurement of wounds is an important component of wound assessment and provides baseline measurements, enables monitoring of healing rates, and helps distinguish among wounds that are static, deteriorating, or improving. All alterations in skin integrity, including those caused by ulcers, venous ulcers, arterial ulcers, neuropathic ulcers, incision lines, grafts, donor sites, abscesses, and rashes should be measured when they’re discovered and at intervals thereafter, based on institutional policy.
Maintaining consistency
Because measurements are compared to determine healing progress, it’s important to use consistent technique. That starts with adequate lighting and cleaning the wound before measuring it.
Here are some more tips for maintaining consistency:
- Position the patient so the wound is as far from the sleep surface as possible; for example, if the wound is on the left hip, position the patient with the right hip resting on the mattress. This makes it easier to access the wound for measurement.
- Place the patient in the same anatomical position each time you take a measurement. Different positions may cause the contours of the surface of the wound to change owing to stretching or sagging of the surrounding skin and prevent accurate measurements.
- Measure and document wounds in centimeters and record measurements in the order of length, width, and depth; for example, “4 cm × 2 cm × 0.5 cm.”
- Use the clock system to ensure consistency in length versus width. Consider the wound as the face of clock, with 12:00 pointing to the patient’s head and 6:00 pointing toward the patient‘s feet. In this case:
- length = 12:00–6:00 with patient’s head and feet as guides
- width = 3:00–9:00 side to side
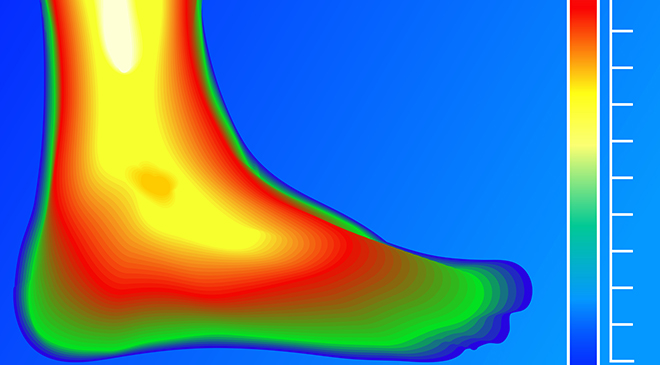
When measuring ulcers on the feet using the clock system, consider the heel as 12:00 and the toes as 6:00.
Procedure
Gather needed equipment, explain the procedure to the patient, and follow these steps for the best results:
1 Prepare a clean, dry work area at the bedside. Apply disinfectant solution to the work surface.
2 Wash your hands and apply gloves.
3 Position the patient so the wound to be measured is as far from the sleep surface as possible. Avoid exposing the patient unnecessarily.
4 Follow your facility’s procedures for dressing removal and wound cleaning.
5 Discard your gloves, wash your hands, and apply clean gloves.
6 Use a centimeter ruler to measure the length of the wound. Take the measurement from open wound edge to open wound edge at the longest point. The direction of length is from head to toe or, using the clock method, 12:00–6:00.
7 Use a centimeter ruler to measure the width of the wound. Again, take the measurement from open wound edge to open wound edge at the longest point. The direction of width is from side to side or, using the clock method, 3:00–9:00.
8 To measure depth, moisten a cotton-tip applicator with saline solution. Place the applicator into the deepest area of the wound, keeping the applicator vertical to the wound bed. Grasp the applicator with the thumb and index finger at the point where the applicator exits the wound at skin level. While still grasping the applicator, remove it from the wound and place it next to the centimeter ruler to measure. If the depth varies, take measurements in different areas. The recorded depth should be the deepest spot of the wound measured.
9 To measure tunneling, insert a saline-moistened cotton-tip applicator into the tunneled area and grasp the applicator where it meets the wound’s edge. While still grasping the applicator, remove it from the wound and place it next to the centimeter ruler to measure. Repeat for each tunneled area.
10 To measure undermining, insert a saline-moistened cotton-tip applicator into the undermined area and grasp the applicator where it meets the wound’s edge. While still grasping the applicator, remove it from the wound and place it next to the centimeter ruler to measure. Progressing in a clockwise direction, document and measure the deepest sites all around the wound edges where undermining occurs.
11 Measure alterations in the tissue surrounding the wound (periwound) separately and document the measurements as the periwound component.
12 Assess wound characteristics to determine appropriate interventions.
13 Apply the prescribed wound treatment and dressing.
12 Discard your gloves and all used supplies in a trash bag, which should then be placed in the appropriate waste receptacle. Wash your hands and make the patient comfortable.
Documentation
Don’t forget to record your findings in the patient’s clinical record. Be sure to document the following (use centimeters for all measurements):
- length, width, and depth in of the wound
- any undermining. Use the clock method and centimeters to describe location and depth. Be as specific as possible. For example, “Undermining noted from 6–10 o’clock, ranging from 2–4 cm, deepest area is 4 cm at 10 o’clock” is helpful, but the following is better: “Undermining noted along wound perimeter from 6–10 o’clock. 6:00—2.8 cm, 7:00—2 cm, 8:00—3.6 cm, 9:00—2.5 cm, 10:00—4 cm.”
- depth and direction of tunneling measurements; for example, “2 cm tunnel at 3 o’clock.”
- any periwound breakdown, including location, characteristics, and measurements.
Nancy Morgan, cofounder of the Wound Care Education Institute, combines her expertise
as a Certified Wound Care Nurse with an extensive background in wound care education and program development as a nurse entrepreneur.
Information in Apple Bites is courtesy of the Wound Care Education Institute (WCEI), copyright 2014.
Disclaimer: The views expressed in this article are those of the author and do not necessarily represent the views of, and should not be attributed to, Wound Care Advisor. All clinical recommendations are intended to assist with determining the appropriate wound therapy for the patient. Responsibility for final decisions and actions related to care of specific patients shall remain the obligation of the institution, its staff, and the patients’ attending physicians. Nothing in this information shall be deemed to constitute the providing of medical care or the diagnosis of any medical condition. Individuals should contact their healthcare providers for medical-related information.

